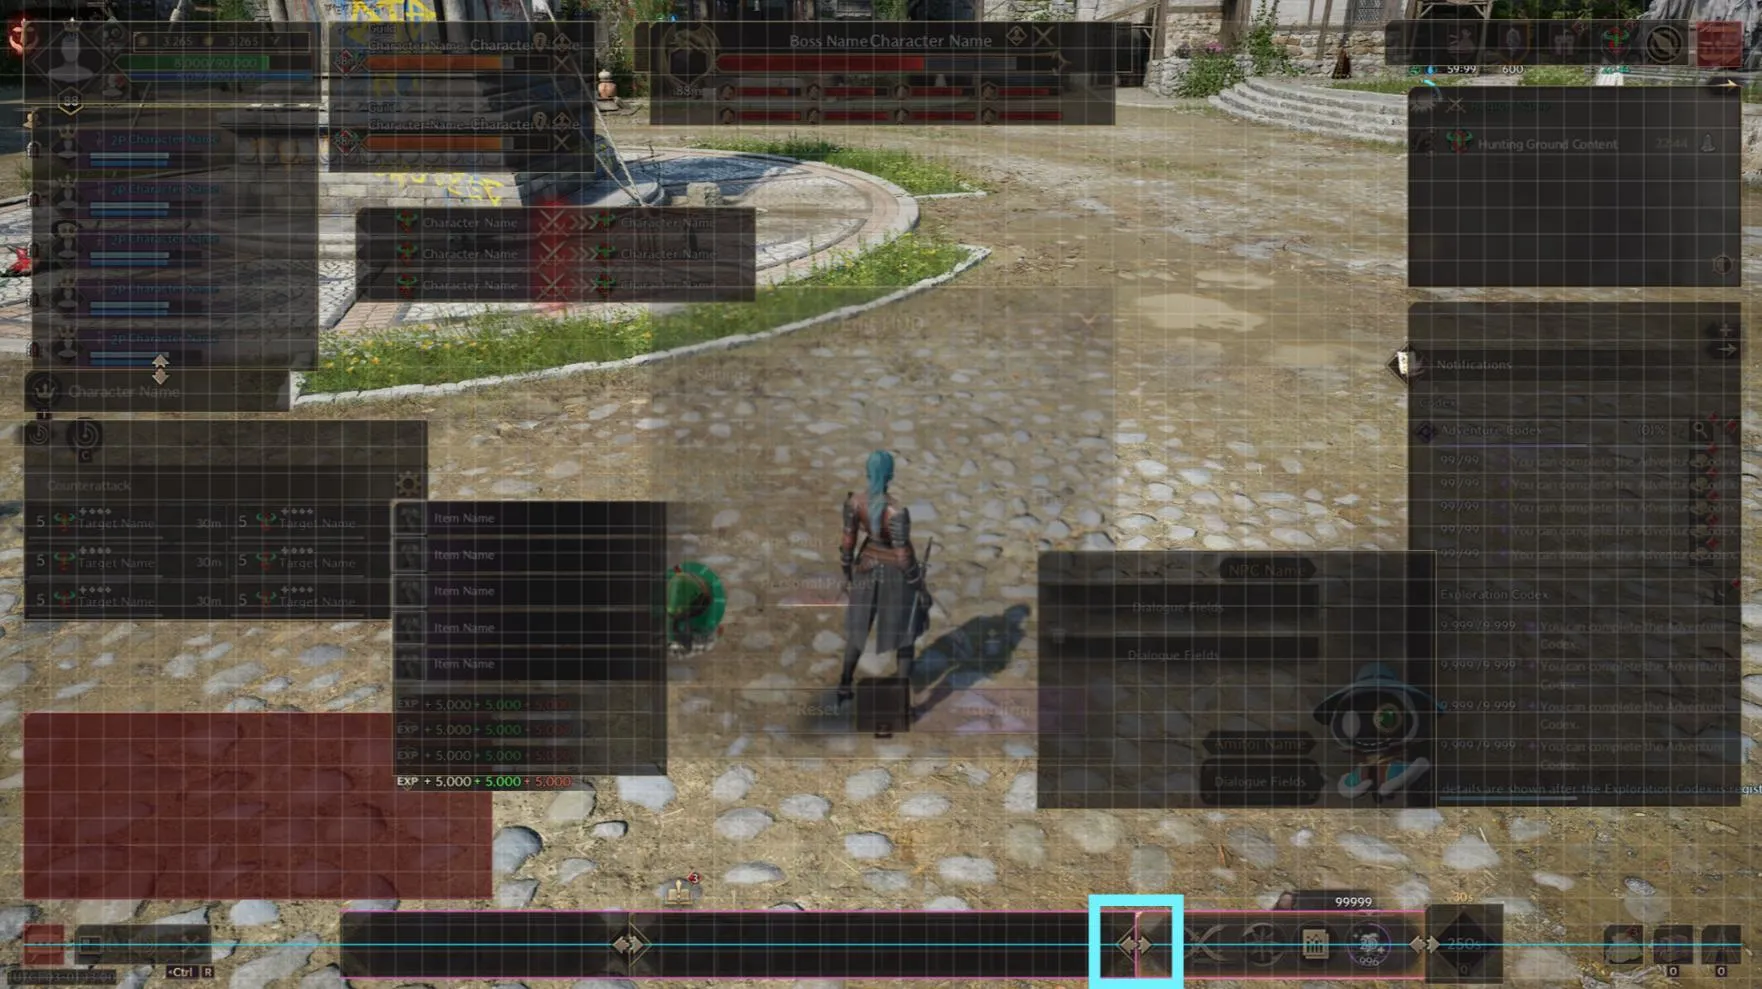
HUD Editing in the game allows players to customize and adjust the user interface (UI) on a PC. Access to HUD editing mode is available through the main menu, and users can utilize the editing panel to set guide margins and distances. The drag-and-drop function allows for the movement of UI elements, with alignment grids as a reference. Certain UI elements marked in red cannot be moved. The Reset button restores the default settings. Changes are applied by pressing the OK button. It is possible to link neighboring UI elements to create a unified interface. Personal presets allow for up to four HUD settings to be saved for each account. Exporting the edited HUD as a file simplifies the sharing of settings. The Edit File section manages editable files, allowing them to be imported and applied.
What is HUD Editing?
This feature allows players to change, save, and share the in-game HUD UI on a PC platform. To enter HUD editing mode, press the button [Main Menu] - [Edit HUD].
Editing Panel
Use the editing panel to configure the editing environment. You can set guide margins and adjust the distance between the grid guides around the screen's perimeter.
Editing.
Drag the mouse to move the UI components. When moving the components, a guiding grid will appear. (Blue: center alignment, Pink: edge alignment)
UI components highlighted in red cannot be moved.
You can return to the default placement settings using the Reset button.
Once finished, press the OK button to apply the changes to the game.
Linking.
When placing UI components near each other, an arrow button will appear.

Clicking this button allows you to "link" adjacent UI components so they can be moved as a single unit. Multiple UI components can also be linked together.
Personal Presets
Each account can save up to four edited HUD settings.
Share Edit Files Export.
You can save the edited HUD as a file to share it outside the game.
Load
If you receive a file from an external source, you can add it to the specified path and load it into the game via the list.